REVIEW · AUCKLAND
Auckland’s Wild West Coast & Black Sand Beaches Tour inc Lunch
Book on Viator →Operated by Cheeky Kiwi Travel · Bookable on Viator
Auckland’s west coast hits hard in just 5 hours. This small-group, fully-guided run takes you from the center of town to Muriwai’s black sand beaches and the mainland gannet colony at a pace that feels realistic. You also get a proper lunch stop at Hallertau Brewery, plus big outlooks from Devonport and North Head.
I especially like the human touch: guides such as Grant and Dean bring stories, local context, and commentary that make the drive and the viewpoints feel meaningful (even when the weather turns). I also like the practical setup—max 15 travelers, modern minibuses, and little extras along the way to keep the day comfortable.
One consideration: the west coast can be windy and wet, and the Muriwai area can feel more exposed than the city. The good news is the tour still works in bad weather, but you’ll want to dress for it.
In This Review
- Key takeaways before you go
- A guided Auckland day trip that actually feels efficient
- Sky Tower start and the North Shore drive over Harbour Bridge
- Hallertau Brewery lunch: a real break, not just fuel
- Muriwai black sand beach: raw coast power in a short window
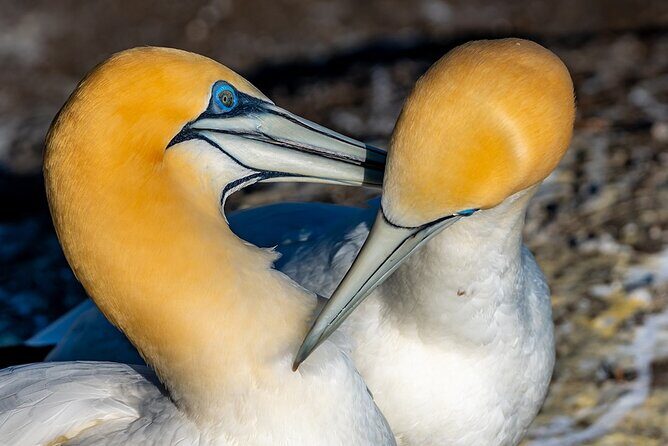
- Muriwai gannet colony: the biggest mainland colony in the North Island
- North Head Historic Reserve near Devonport: volcanic cone views
- Back to Auckland Central: ferry option across the harbour
- Price and value: what NZD $108.60 buys you in real terms
- Who this tour suits best (and who should consider alternatives)
- Should you book this Wild West Coast & Black Sand Beaches Tour?
- FAQ
- FAQ
- How long is the Auckland Wild West Coast & Black Sand Beaches Tour?
- Where does the tour start, and where does it end?
- What’s the group size?
- Is lunch included, and is craft beer tasting included too?
- Do children need car seats?
- Can I cancel for free?
Key takeaways before you go
- Small group (max 15): easier questions, less waiting, and more time at each stop than big coach trips.
- Muriwai black sand + gannets together: you see the dramatic shoreline and then the wildlife hotspot without rushing between them.
- Hallertau Brewery lunch included: a planned sit-down break, not just a snack stop.
- Devonport + North Head views: a historic volcanic cone with panoramic angles over the Hauraki Gulf.
- Ferry option back to the city: a scenic way to close the day.
A guided Auckland day trip that actually feels efficient
This tour is built around a simple idea: the west coast highlights north of Auckland are spread out, but you can still see them in one half-day style outing. You get city-to-coast transport, guidance at the key moments, and enough structure to keep you from spending your vacation time figuring out routes and parking.
What makes it more than a checklist is the guide-led storytelling. People often focus on the big sights—black sand, gannets, lookout points—but the best part is how the day connects those places with local context. On this run, the commentary is clearly part of the value, and guides such as Grant and Dean are specifically noted for making the history and scenery fun to follow.
There’s also a comfortable rhythm to the day. You start in Auckland, get orientation while you travel out over the harbour, then you hit your stops in an order that flows naturally: brewery lunch, then coast, then viewpoints, then back to the city.
You can also read our reviews of more tours and experiences in Auckland

Sky Tower start and the North Shore drive over Harbour Bridge
You’ll meet at Auckland Sky Tower on Victoria Street West, with a 12:00 pm start. That’s a useful starting point because it puts you right where most visitors want to be anyway, and it helps you avoid the awkward early scramble to meet somewhere far outside the center.
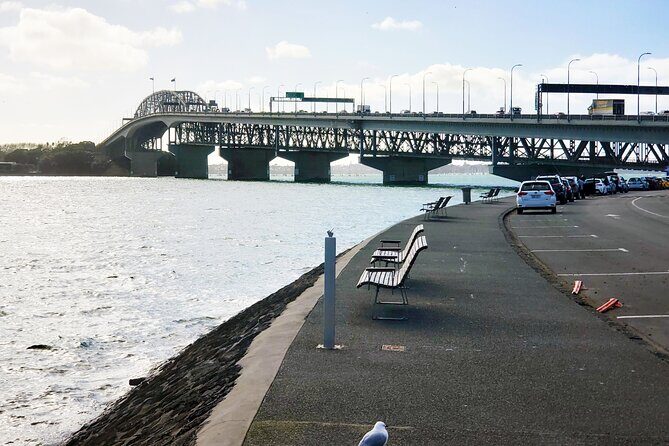
The day kicks off with a guided run out of the city over the Harbour Bridge to Auckland’s North Shore. Even if you’re not a big vehicle-window person, that drive matters. It gives you bearings fast, and it sets expectations for what the rest of the day feels like—urban harbour energy first, then open coastline.
The tour uses modern, comfortable minibuses, with extra items included for comfort and safety. That sounds minor until you’re sitting in a group that actually moves well and doesn’t feel cramped or chaotic.
Practical tip: if you get motion-sensitive, you’ll usually do better toward the front of the minibus. It’s a small thing, but it can change the experience.
Hallertau Brewery lunch: a real break, not just fuel
Next up is Hallertau Brewery, where you’re treated to lunch from a special set menu. Lunch is one of the biggest factors in why the price feels fair, because it’s not a bare-bones snack stop. It’s a planned sit-down moment that breaks the day into two halves: food first, then the outdoors.
After lunch, you have the option to try Hallertau’s craft beers. This part isn’t included automatically, since craft beer tasting is described as additional cost. If you don’t drink, it’s easy to skip without affecting the rest of your day.
I like that the tour builds the brewery stop into the schedule instead of squeezing lunch around the wildlife windows. With gannets and coast time involved, you don’t want to gamble on finding food nearby while buses move on. Here, lunch is handled.
One note from real-world experience: lunch quality can land differently depending on what you choose and the day’s menu. Some people rate it as magnificent, while others call it average. Either way, you should expect a straightforward brewery lunch, not fine-dining.
Muriwai black sand beach: raw coast power in a short window
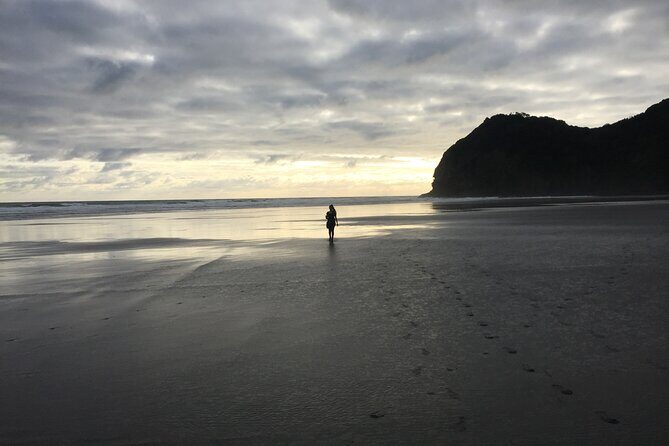
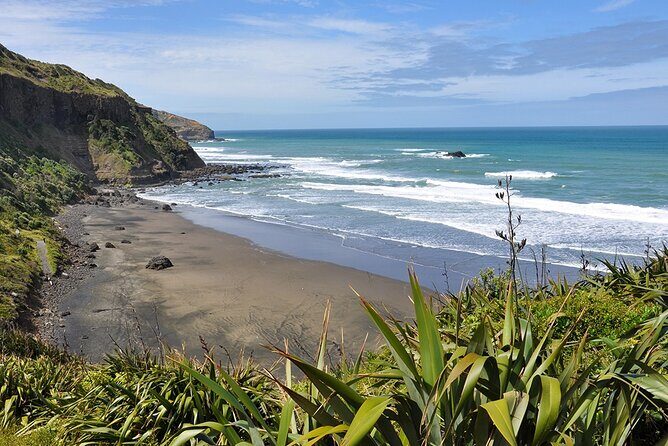
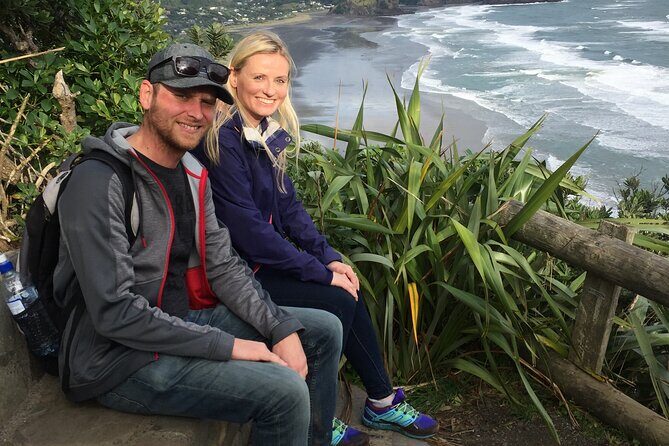
After the brewery, you head to Muriwai Beach, one of Auckland’s best-known wild coastline stops. You get about 30 minutes to explore the shoreline area.
This short timing is a trade-off, but it’s a smart one. The black sand and the rugged coastline are the point, and the tour keeps you from burning the whole afternoon walking when there’s more to see—especially the gannet colony lookout.
What you’ll notice quickly is how exposed the shoreline feels. It’s not a sheltered beach day. The coast here is dramatic, with strong weather potential and plenty of space for wind and spray to do their thing. On rainy and windy days, the scenery can still be stunning, but it can feel colder and louder.
Practical tip: bring something with a bit of wind protection if the forecast looks rough. Also, wear shoes you’re happy to get sandy or slightly muddy.
Muriwai gannet colony: the biggest mainland colony in the North Island
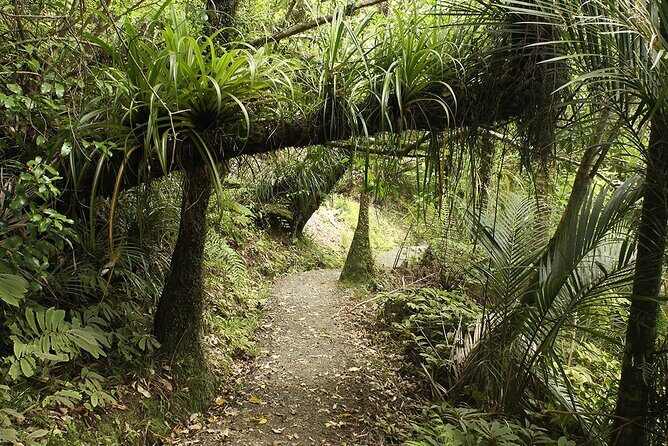
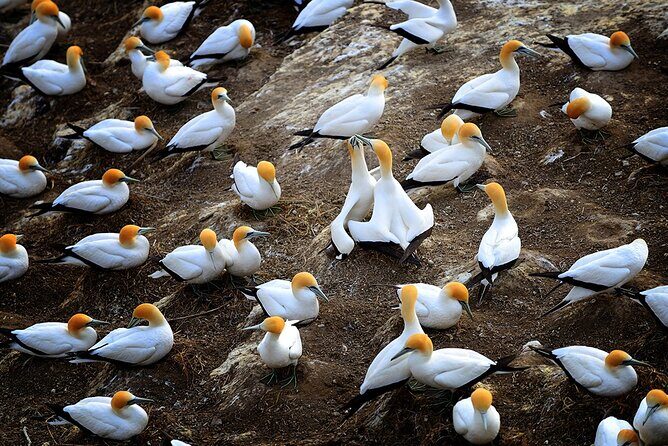
The highlight for wildlife lovers is the Muriwai Gannet Colony. From the beach, you walk up toward viewpoint areas, and you’ll get around 1 hour here.
This stop matters because you’re not just looking at a beach—you’re visiting one of the standout seabird locations in the region. The tour specifically describes it as the largest mainland gannet colony in the North Island, and that scale shows when you get close.
What makes the timing work is that the colony visit is separate from the beach visit. You don’t just sprint from one photo spot to another. You get a chance to settle, look for nesting activity, and enjoy the views from the higher vantage point.
If the weather is bad, this is still the kind of place where the day can keep delivering. Even in rain or wind, the birds and the cliffs can make you forget the discomfort—especially once the guide is pointing out what to watch for.
One consideration: it’s a walk up from the beach area. The tour says you should have a moderate physical fitness level, so if mobility is limited, plan for uneven ground and steps.

North Head Historic Reserve near Devonport: volcanic cone views
After crossing back over the harbour area, you go to Devonport and then up to North Head Historic Reserve. You’ll spend about 45 minutes, with a scenic drive to the top.
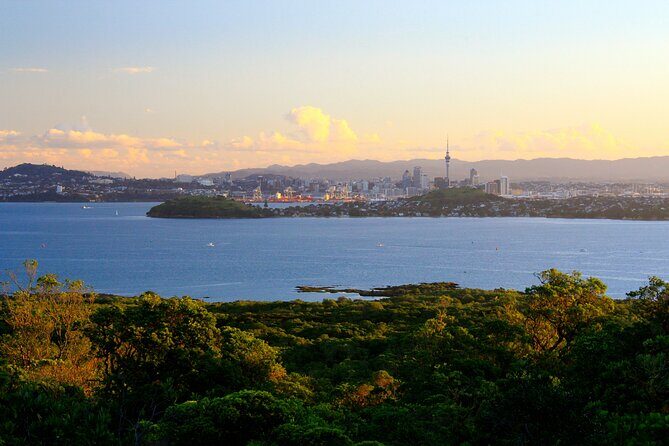
North Head is described as a historic volcanic cone, and it’s famous for sweeping viewpoints over the Hauraki Gulf and out toward the city. This is where the tour shifts from wildlife and coast drama to big panoramic city-and-water perspective.
What I like about this stop is that it gives you variety without stretching the schedule. You’re still in the same general “west coast and North Shore” story, but you’re changing the visual angle: seabirds and black sand below, open outlook above.
Weather can also make North Head more interesting. Wind amplifies the feeling of being up high and exposed, which can be part of why the views hit so hard. Dress accordingly and take your time at the viewpoints.
Back to Auckland Central: ferry option across the harbour
To wrap up, you return through Devonport and head back toward Auckland Central. The schedule shows about 15 minutes for the final transfer, with an option to take a scenic ferry ride back across the harbour.
That ferry option is a smart closer. It turns the end of the day into something scenic instead of just another ride back. You also get a different perspective on the harbour—good timing if you’re tired of sitting in a vehicle by then.
If you’re thinking ahead: keep your camera handy for the ferry crossing. Harbour views can look totally different depending on cloud cover and late-afternoon light.
Price and value: what NZD $108.60 buys you in real terms
At $108.60 per person, this isn’t a cheap “grab-and-go” ticket, but it’s also not priced like a private charter. The value comes from what’s included and the efficiency of the route.
Here’s what the price covers, based on the tour’s stated inclusions:
- Small group + fully guided experience
- Lunch from a set menu at Hallertau
- Park entry fees
- Admission-free time at the stops listed as free within the itinerary (so you’re not paying multiple little tickets)
And here’s what costs extra:
- Craft beer tasting is optional and described as additional cost.
When I compare this kind of tour to doing it on your own, the biggest thing you’re paying for is time and guidance. The west coast sites aren’t hard to reach, but they do take planning—especially if you want the colony viewing and the viewpoints without cutting your stops short. This tour builds the day for you, with a driver and guide doing the timing.
So if you’re the type who wants to see a lot without thinking about logistics all day, this is a strong match.
Who this tour suits best (and who should consider alternatives)
This is a great fit if you want:
- Wildlife + coast in one run (black sand first, gannets next)
- A guided day where the driving, viewpoints, and nature stops feel connected
- A scheduled lunch included, with the option to add craft beer tasting
You might want to pick something else if you’re looking for:
- A super long stretch of beach time. You only get about 30 minutes at Muriwai, by design.
- A totally independent day with no walking at all. There’s a walk from the beach up to the colony viewpoints.
Families: the tour notes children aged 7 and below must use a child safety car seat. You can hire seats for $20 NZD per seat, or bring your own. If you’re travelling with kids, that’s a detail worth handling early so you don’t lose time on the day.
If you’re in moderate physical shape, you’ll be fine with the walking involved. If not, it’s still worth asking questions before booking so you understand how the route matches your comfort level.
Should you book this Wild West Coast & Black Sand Beaches Tour?
Yes, if you want a smart, guided half-day that hits the most iconic west-coast/North Shore stops with less friction. The strongest reasons to book are the combination of Muriwai black sand, the gannet colony, and a proper included Hallertau lunch, all in a max-15 group with guides who are genuinely good at making the story land.
Also, don’t stress too much about weather. When the day is rainy and windy, the coast can still deliver, and the guide commentary seems to be the factor that keeps things enjoyable when conditions aren’t perfect.
I’d especially recommend this for first-time visitors to Auckland who want to see more than just the city. If you’ve got limited time and you want the best west-coast hits in one coordinated day, this is built for you.
FAQ
FAQ
How long is the Auckland Wild West Coast & Black Sand Beaches Tour?
It runs for about 5 hours (approximately).
Where does the tour start, and where does it end?
The tour meets at Auckland Sky Tower on Victoria Street West in Auckland Central, and it ends back at the same meeting point.
What’s the group size?
The tour has a maximum of 15 travelers.
Is lunch included, and is craft beer tasting included too?
Lunch is included as a set menu at Hallertau Brewery. Craft beer tasting is optional and is listed as an additional cost.
Do children need car seats?
Yes. Children aged 7 years and below are required to travel in a child safety car seat. You can hire a seat for $20 NZD per seat or bring your own.
Can I cancel for free?
Yes. You can cancel for free up to 24 hours in advance for a full refund. If you cancel less than 24 hours before the start time, the amount paid is not refunded.