West Coast Auckland planning can be a headache. That’s why this private day feels so worth it: you get a luxury vehicle, a dedicated driver, and a schedule that you can shape around what you care about most. Unlimited kilometres means you’re not stuck with a tight loop, and your driver can pace the day to match your energy.
I especially like two things. First, the itinerary mixes big, iconic viewpoints with quieter stops along Auckland’s coasts and harbours, so you’re not just ticking boxes. Second, the guide behind the wheel is clearly good at reading the day—Silva has been praised for being flexible and for helping even when the weather turns rough, with practical touches like water and raincoats.
The main drawback to weigh is the price per group. At $565 per group (up to 4), it can feel steep if you’re travelling solo or short on time. But if you’re 2–4 people and want maximum efficiency, it starts to look like a smart use of money.
In This Review
- Key highlights worth caring about
- Private driver, real flexibility (and why it matters in Auckland)
- West Coast mood: Piha Lookout and Piha Beach
- Kitekite Falls: the walk break that turns scenery into a moment
- Mercer Bay Loop Walk lookout: cliff-top drama without the whole hike
- Arataki Visitor Centre in the Waitākere Ranges: start the forest section right
- Karekare Falls and Karekare Beach: two short stops, big impact
- Mount Eden and One Tree Hill: volcanic viewpoints with payoff
- Central Auckland coast views: Achilles Point, Bastion Point, Mission Bay
- Sulphur Beach Reserve and the North Shore: skyline and beaches
- Auckland Harbour Bridge and city arts breaks
- Kumeu wineries: when the day gets social
- Muriwai gannets and West Coast wildlife viewing
- Optional big-name spots: Zoo, museums, botanic gardens, and waterfalls
- Half-day vs full-day: how to choose your pace
- Price and value: is $565 per group a fair deal?
- Should you book this Auckland hidden-gems style private tour?
- FAQ
- How many people can join this private tour?
- What tour lengths are available?
- Is pickup offered?
- Can we customize the route and stops?
- Are admission tickets included?
- Do children need a car seat?
- Can I cancel and get a full refund?
Key highlights worth caring about
- Private, one-group-only touring with Silva
- Unlimited kilometres for a true cross-city day
- Real walking options like Kitekite Falls and the Mercer Bay Loop
- Wine tasting stop options in Kumeu at Soljans and Westbrook
- A mix of coast views and city culture without stress
Private driver, real flexibility (and why it matters in Auckland)
Auckland rewards people who move smart. Distances can surprise you, and traffic and parking can turn a good plan into a slow plan. This tour solves the main pain point by giving you a dedicated driver in a luxury vehicle plus pickup, so you can focus on the scenery—not logistics.
The custom side is the real win. You can choose from popular stops or create your own route, and the day still works because unlimited kilometres remove a big constraint. That means you can add or swap sections like the Piha coast run, Mount Eden viewpoints, or a North Shore detour without constantly recalculating costs.
It also helps that this is a small-group setup. Your time is yours. If you want extra minutes for a photo, a coffee break, or a slower pace on a walk, the tour can flex around that. Silva’s approach is repeatedly described as accommodating and flexible, even on high-energy days packed with viewpoints and short hikes.
You can also read our reviews of more private tours in Auckland



West Coast mood: Piha Lookout and Piha Beach
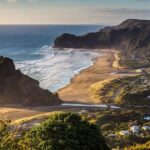
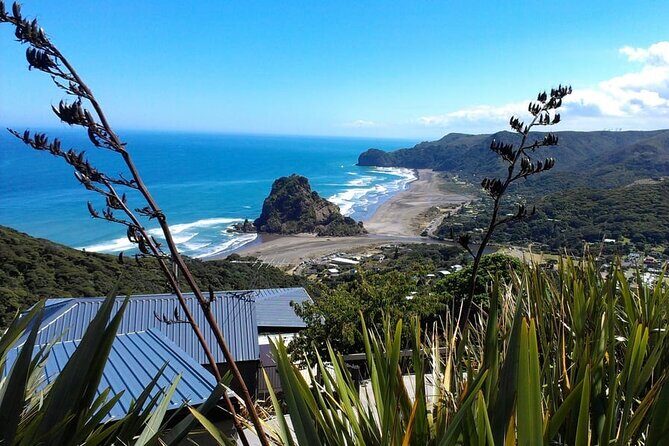
If you want dramatic coast views fast, start with Piha. The tour’s Piha Beach Lookout sits about 2.6 km north of the village and is built for stunning panoramas over Piha Beach and Lion Rock. The stop is short (around 5 minutes), which is exactly right: you get the payoff quickly, then you move on before the day gets bogged down.
Piha Beach itself is an iconic black sand surf beach. The scheduled time is about 30 minutes. That’s enough to walk the shore edge, take in the contrast of dark sand against the ocean, and reset before the next forest-and-falls portion of the day. The big practical note here: West Coast weather can change quickly. Sturdy shoes and a light rain layer help. Based on how Silva is described in rain, it sounds like you’ll be supported if conditions get messy.
A small consideration: black sand beaches can feel colder or windier than you expect, especially near lookouts and cliff zones. Plan for comfort, not just photos.
Kitekite Falls: the walk break that turns scenery into a moment
Kitekite Falls is the type of stop that makes the day feel personal rather than rushed. The timing is built around a real walk: about a 60-minute return through lush native bush to reach a multi-tiered waterfall. The itinerary lists it as optional, but if you’re comfortable walking, this is one of the best “stop and breathe” options.
What I like about this kind of break is that it changes the sensory pace of the day. You go from ocean viewpoints to a shaded bush route, then back out again. If your half-day is tight, you might skip it. If you’re doing a full day, it’s a strong use of time because the payoff feels worth the effort.
The trade-off is straightforward: you need legs for a 60-minute return walk. If you’re travelling with someone who prefers short, flat sightseeing, consider choosing the quicker lookout and beach segments instead.
Mercer Bay Loop Walk lookout: cliff-top drama without the whole hike

Another optional walking-style stop is the Mercer Bay Loop Track. The itinerary time is about 45 minutes for the loop, focused on cliff-top coastal views. This is a good compromise if you want the “nature plus ocean view” feeling but don’t want to commit to longer hikes.
Why this works well on a private tour: you can match it to your day. If you’re arriving refreshed, take the loop. If the weather is turning or you’re running behind, you can still prioritize nearby viewpoints instead.
One practical thing to remember: these paths are outdoors and weather can matter. A quick rain check and good grip on footwear go a long way.
Arataki Visitor Centre in the Waitākere Ranges: start the forest section right
Arataki Visitor Centre is the official entrance to the Waitākere Ranges, and it’s a smart early waypoint if you’re aiming for a forest-and-falls day. The listed time is about 30 minutes, which gives you space to take in lookout platforms and photos before you move deeper into the coast segments.
I like this stop because it helps you connect the dots. You’re going from sea cliffs to native bush, and Arataki acts like a theme switch that makes the rest of the scenery more meaningful. Even if you don’t spend long inside, it’s a good place to regroup, use facilities if needed, and tighten your plans for the next short walk or lookout.
You can also read our reviews of more tours and experiences in Auckland


Karekare Falls and Karekare Beach: two short stops, big impact

Karekare Falls is listed as optional with about 15 minutes. That’s a quick window, but it’s long enough to see the waterfall setting and get a few photos without eating your whole day. Right after it, Karekare Beach is scheduled for about 15 minutes too, just a short walk away.
This pair is useful because you get both “waterfall in the bush” energy and “black sand coast” energy with minimal time cost. If you’re trying to cover a lot in one day, these short stops help you do that without sacrificing the special feeling of Auckland’s wild west.
Mount Eden and One Tree Hill: volcanic viewpoints with payoff
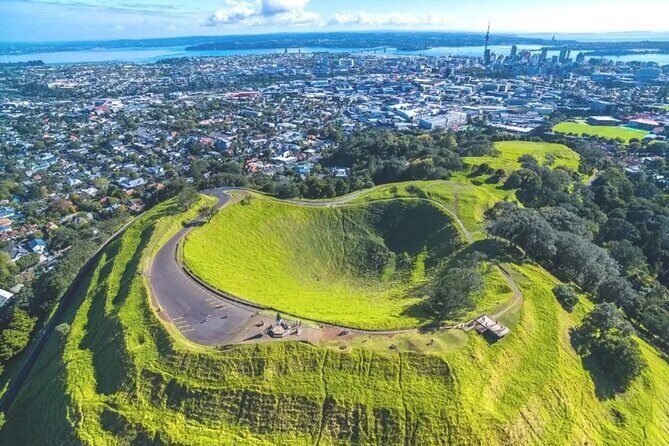
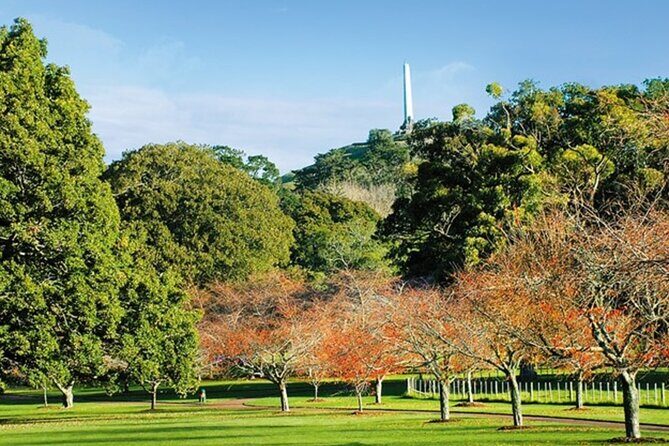
Now you shift from the west-coast wildness back toward city-shaping viewpoints. Mount Eden (Maungawhau) is Auckland’s highest natural point at 196 metres, and the itinerary includes about 30 minutes. You’ll get wide views from the volcanic cone, and it’s one of those stops that helps you understand how Auckland spreads across land and water.
One Tree Hill (Maungakiekie) is also an iconic volcanic cone, with cultural and historical significance noted in the description. The tour time is about 30 minutes. Even if you’re not deeply into interpretive history, the viewpoint aspect is strong, and the cultural framing adds weight to the stop.
A small consideration: on volcanic cones, weather and visibility can make or break your photos. If it’s cloudy, you might still enjoy the atmosphere, but your skyline shots could be limited.
Central Auckland coast views: Achilles Point, Bastion Point, Mission Bay

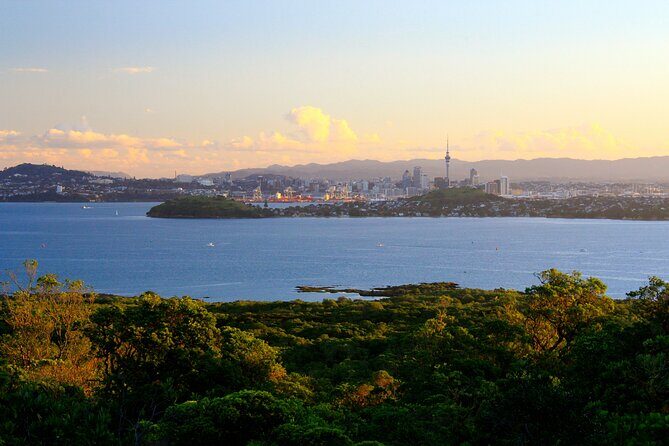
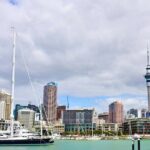
If you’re doing a full day, you’ll likely want a smoother transition from volcanic cones to harbour and coast views. Achilles Point offers panoramic views of the Hauraki Gulf, Rangitoto Island, and the city skyline, with a very short stop (about 5 minutes). That makes it a good “photo and breathe” break.
Bastion Point follows with about 10 minutes. It’s known for looking over Waitematā Harbour and Mission Bay, and it’s a nice place to slow down for a calm moment. Mission Bay itself is scheduled for about 20 minutes, and it’s a popular seaside area with the kind of casual waterfront vibe that works well for a quick snack.
This is where private guiding really pays off. Instead of commuting and searching for parking, you arrive, park itself for you, and you move on when you’re ready.
Sulphur Beach Reserve and the North Shore: skyline and beaches
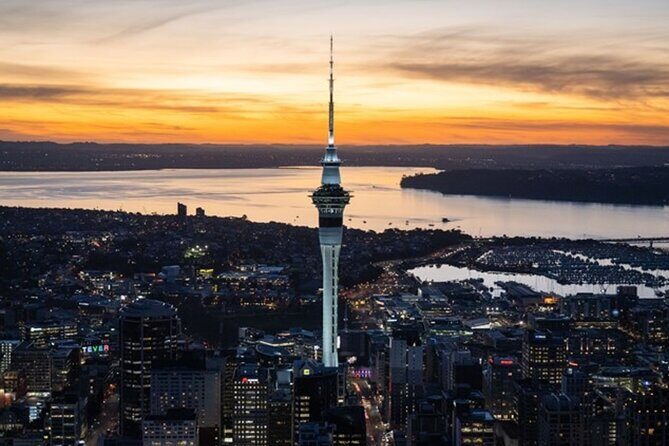
Sulphur Beach Reserve is described as a best photography location for skyline views across the harbour. It’s a short stop (about 10 minutes), but it’s designed to give you the iconic city backdrop quickly.
Then the itinerary can branch into the North Shore beaches. Takapuna Beach is optional with about 20 minutes. Little Shoal Bay Reserve is optional with about 30 minutes, with grassy picnic areas and walking tracks noted. The longer time at Little Shoal Bay makes sense: it’s easier to turn that into a slow coastal reset.
If you’re planning your own route, this is where I’d be strategic. If you’re chasing photos, focus on Sulphur Beach and keep the rest short. If you want a less hectic day, give the North Shore stops a bit more time.
Auckland Harbour Bridge and city arts breaks
An Auckland day often needs at least one “big city” moment. The harbour bridge stop is optional with about 10 minutes, and the listing mentions it as tied to AJ Hackett Bridge Climb and SkyJump Bungy. Those are not described as included, so treat the bridge as a viewing stop unless you add separate ticketed activities.
Westhaven Marina is optional with about 10 minutes. It’s a busy marina area with yachts and scenic walking paths, so even a brief stop can feel lively.
If you want a calmer indoor option, Auckland Art Gallery Toi o Tāmaki is optional with about 1 hour and is described as the largest visual arts experience in New Zealand. This is a smart midday pivot, especially if the weather is unpredictable.
After that, you can slide into green space and creative neighbourhood streets: Albert Park (about 30 minutes), Karangahape Road or K Road (about 10 minutes), and Ponsonby (about 10 minutes). Those are short, but they help you feel the city beyond viewpoints.
Kumeu wineries: when the day gets social
Wine lovers can add Kumeu and taste options with Soljans Estate Winery and Westbrook Winery. Kumeu itself is optional with about 10 minutes, then Soljans is about 20 minutes, and Westbrook is about 20 minutes.
This is one of the best “value add” sections for a private tour because it makes your Auckland day more than scenery. You’re not just looking at places; you’re sampling local culture. It also helps if your group has mixed interests. One person can focus on coastal views while another looks forward to tastings.
Timing is the only real constraint. Wine stops take the day from “quick look and go” into “slow down and enjoy.” That’s fine for a full day. For a half-day, pick one tasting option or scale back the number of other stops.
Muriwai gannets and West Coast wildlife viewing
If you want more than beaches and cliffs, Muriwai Gannet Colony is optional with about 20 minutes. It’s a clifftop sanctuary hosting over a thousand nesting Australasian gannets, and there are easy walking tracks that lead to viewing platforms.
This is a strong stop because it feels different from the rest of Auckland. It’s wildlife viewing with dramatic coastline behind it. If you’re tight on time, it still works because the itinerary doesn’t demand a long hike—just a focused stop for the viewing area.
A consideration: wildlife areas can be windy and exposed. Dress accordingly and expect that the experience is weather-dependent.
Optional big-name spots: Zoo, museums, botanic gardens, and waterfalls
This tour can flex into a wide range of Auckland activities, depending on your choices and how full your time window is.
- Auckland Zoo is optional for about 1 hour, but admissions are not included.
- Auckland War Memorial Museum is optional with about 30 minutes, and the listing mentions a Māori Cultural Experience performance (with a 30-minute slot shown).
- Auckland Botanic Gardens is optional for about 30 minutes.
- Hūnua Falls is optional for about 30 minutes in the Hunua Ranges Regional Park.
- Winter Garden Auckland Domain is optional for about 30 minutes.
- SkyCity Auckland is optional for about 30 minutes, and admissions are not included.
These are good to know if you’re travelling with kids, or if you want a museum-and-gardens day instead of a coast-and-cliffs day. The private format helps here because you can avoid the hassle of bouncing between far-out areas on public transport.
Half-day vs full-day: how to choose your pace
This tour offers half-day and full-day options, with durations that can go up to around 3 hours or 7 hours for half-day, and up to around 10 hours or 13 hours for full-day. Your exact itinerary is custom, but the structure matters.
A half-day is best when you have one priority cluster:
- West Coast focus: Piha plus one or two nearby stops.
- City viewpoint focus: Mount Eden/One Tree Hill plus central harbour viewpoints.
- Wine focus: Kumeu plus one winery, keeping everything else light.
A full day is where this tour really shows its power. You can stack west-coast drama in the morning, volcanic viewpoints around midday, then harbour and North Shore scenes later—plus optional wine tasting or wildlife.
The guide’s reputation for running a high-energy day without losing patience matters here. If you do choose the longer format, wear shoes for walking days. Keep a rain layer handy. And don’t try to pack every possible stop—pick the ones that match your group’s mood.
Price and value: is $565 per group a fair deal?
At $565 per group (up to 4), you’re paying for more than transport. You’re paying for the combination of:
- a dedicated driver,
- a luxury vehicle,
- unlimited kilometres,
- and the ability to customize rather than follow a fixed script.
That price tends to make more sense when you split it across 2–4 people. In that case, you get to cover far-flung areas like Piha/Waitākere Ranges and the North Shore in the same day without planning separate transport.
If you’re travelling solo, or you’d rather explore slowly without a driver, it might feel expensive. But if your goal is to see a lot without wasting hours on navigation, this format is one of the more practical ways to get Auckland’s variety in one shot.
Also worth noting: the tour is rated very highly (4.9) with a strong recommendation rate (96%). That usually reflects service quality and pacing, not just the sightseeing list.
Should you book this Auckland hidden-gems style private tour?
I’d book it if you fit one of these profiles:
- You’re travelling as a couple or small family and want a stress-free day with a dedicated driver.
- You want coast-and-views plus a chance to add wine tasting or a museum stop.
- You have limited time and want smart routing instead of guessing.
I’d think twice if:
- You’re travelling solo and the group price doesn’t fit your budget.
- Your group doesn’t want any walking. Some options include a longer return walk like Kitekite Falls and a 45-minute loop track.
If you do book, I’d plan your choices around energy, not ambition. Pick one west-coast highlight, one viewpoint area, and then let the rest be flexible. That’s when this kind of private day feels like it was made for you.
FAQ
How many people can join this private tour?
The tour is private, and the group size is up to 4 people.
What tour lengths are available?
The experience duration is flexible, listed as approximately 1 to 13 hours, with half-day options up to about 3 hours or 7 hours and full-day options up to about 10 hours or 13 hours.
Is pickup offered?
Yes, pickup is offered.
Can we customize the route and stops?
Yes. You can choose popular attractions from the itinerary or create your own custom route.
Are admission tickets included?
Most stops are listed as admission free. Auckland Zoo and SkyCity Auckland are listed as admission ticket not included.
Do children need a car seat?
Children under 7 must be in an approved child restraint.
Can I cancel and get a full refund?
Yes. Free cancellation is available, and you can cancel up to 24 hours in advance for a full refund. If you cancel less than 24 hours before the start time, the amount paid is not refunded.