REVIEW · AUCKLAND
Auckland Full Day Attractions & Museums Tour
Book on Viator →Operated by Kowi Tour · Bookable on Viator
Auckland on one day is a real shortcut. This 7-hour attractions and museums tour strings together harbour views, city viewpoints, and major stops without making you plan transit. You get pickup, a small group, and a guide to connect the dots between places that look beautiful and places that carry meaning.
I especially like the mix of nature + culture. You’ll move from Mount Eden’s high viewpoint to gardens in the Domain, then into the Auckland Museum and the Auckland Art Gallery, all with the same easy rhythm of a guided day. I also like that some entry is handled for you—Auckland Museum general entrance is included, and Holy Trinity Cathedral tickets are included too.
One drawback to know up front: food and drink aren’t included. You’ll want to plan lunch on your own between stops, and you should bring water, especially if the day is warmer than expected.
In This Review
- Key Things to Know Before You Go
- A 7-Hour Auckland Day That Actually Feels Manageable
- Price and Value: Is $217.20 a Fair Deal?
- Getting Around in a Small Group (Pickup, Comfort, and Time on Your Side)
- Stop 1: Auckland Harbour Bridge for Immediate City Orientation
- Stop 2: Mount Eden (Maungawhau) and Its 196-Metre View
- Stop 3: Auckland Museum for Meaning (And Not Just Standing Around)
- Stop 4: Winter Garden Auckland Domain for a Historic Green Break
- Stop 5: Holy Trinity Cathedral in Parnell for Architecture and Spirit
- Stop 6: Achilles Point at St Heliers Bay for Hauraki Gulf Views
- Stop 7: Auckland Art Gallery Toi o Tāmaki Near Albert Park
- How to Plan Your Day So You Enjoy Every Stop
- Booking Timing and What the 49-Day Average Really Means
- The Overall Verdict: Should You Book This Auckland Day Tour?
- FAQ
- How long is the Auckland Full Day Attractions & Museums Tour?
- What time does the tour start?
- Does the tour offer pickup?
- How many people are in the group?
- Are tickets included for all stops?
- Is food and drink included?
- What is the cancellation policy?
Key Things to Know Before You Go
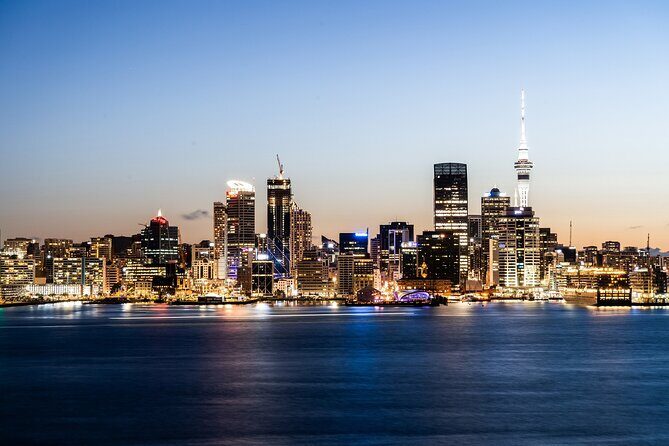
- Small group (max 11 travelers) keeps the day feeling personal instead of rushed.
- Pickup + air-conditioned vehicle makes hopping between areas easier.
- Included admissions at Auckland Museum and Holy Trinity Cathedral save time and cost.
- Panoramic viewpoint time is built in at Mount Eden and Achilles Point.
- Plenty of free-entry stops balance the paid museum and cathedral with lower out-of-pocket moments.
A 7-Hour Auckland Day That Actually Feels Manageable
This tour works because it gives you a structured route through Auckland without trapping you in a long bus day. You start at 9:30am and finish back at the meeting point, with about 7 hours total. That’s enough time to see a lot of different parts of the city, and still keep the mood relaxed.
What I like most is the variety. You’re not just sightseeing from one neighborhood. You get an Auckland Harbour Bridge moment, a viewpoint on Mount Eden, a museum for context, a historic garden setting, then more viewpoints and culture with Achilles Point and the Auckland Art Gallery.
And it’s priced like a guided day, not like a collection of random tickets. At $217.20 per person, the value hinges on whether you want someone else to manage the route while you focus on enjoying the stops.
You can also read our reviews of more museum experiences in Auckland



Price and Value: Is $217.20 a Fair Deal?

At $217.20 per person for roughly 7 hours, you’re paying for more than entry tickets. You’re covering the guided experience plus the air-conditioned vehicle, parking fees, fuel surcharge, GST, and the guide and driver. The admissions mix matters too: Auckland Museum general entrance is included, and Holy Trinity Cathedral is included.
Several other stops are free—Auckland Harbour Bridge, Mount Eden, Winter Garden, Achilles Point, and the Auckland Art Gallery all list free admission tickets in the schedule you’ll follow. That means your paid portion isn’t just going toward one venue. You’re getting a full day’s worth of guided movement and “setup time,” which is often the hidden cost of DIY planning.
One thing to keep in mind: food isn’t included. If you treat lunch as part of the overall budget, this tour can still feel like good value, because you’re not also paying for separate guided transport plus multiple entries.
If you’re trying to maximize a single day in Auckland—especially if you don’t want to think about buses, parking, or sequencing—that price can make sense.
Getting Around in a Small Group (Pickup, Comfort, and Time on Your Side)
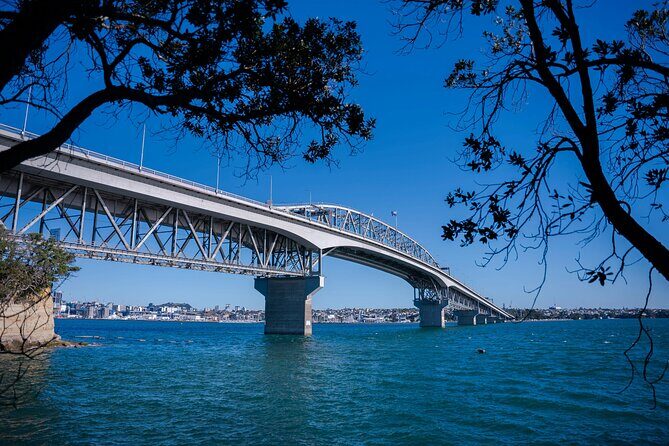
This tour caps at 11 travelers, and that’s a big deal for a full-day city run. With a smaller group, you tend to spend less time waiting and more time actually looking around.
Pickup is offered, and that’s often where a day tour either shines or falls apart. Instead of spending your morning figuring out transit routes, you’re starting the day already “in motion” with the tour van and guide.
You’ll also be in an air-conditioned vehicle. In a city like Auckland, where weather can shift, that comfort matters more than people expect. Even if the air outside is fine, you’ll appreciate a cool ride between stops.
You get a mobile ticket, which is handy for day-of timing. It means you’re not hunting for paper tickets or dealing with last-minute printing.
Also, the tour is near public transportation. If you do not want pickup, or you’re traveling from elsewhere in town, you have options for getting to the meeting point area—but the schedule does assume you’ll join the day the way the provider sets it up.
Stop 1: Auckland Harbour Bridge for Immediate City Orientation
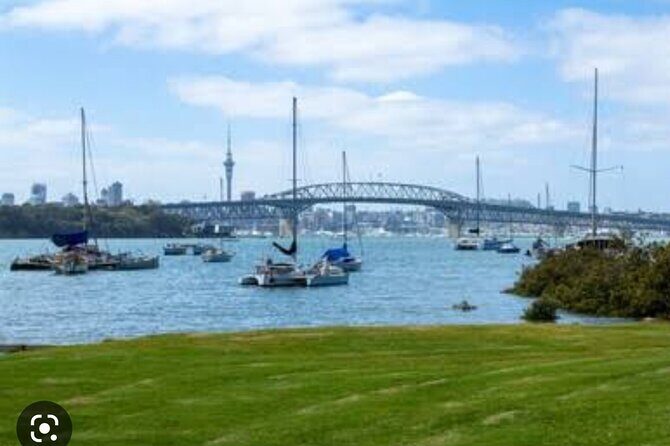
Your first photo moment is Auckland Harbour Bridge. The key is what it represents: it spans the Waitematā Harbour and connects the CBD with the North Shore. Even if you’ve never been to Auckland before, seeing that connection helps you understand how the city is laid out—water, neighborhoods, and movement across the harbour.
This stop is short—about 20 minutes—and that’s by design. Early in the day, a short “big landmark” stop is perfect because it gives you bearings fast and sets momentum.
Admission here is free. That means you’re not spending money on the earliest part of the route, and you can put that energy into noticing what’s around you—harbour views, the scale of the bridge, and the way the CBD sits by the water.
If you’re the type who likes to take a few steady shots rather than sprinting for Instagram photos, you’ll still have enough time to breathe.
Stop 2: Mount Eden (Maungawhau) and Its 196-Metre View
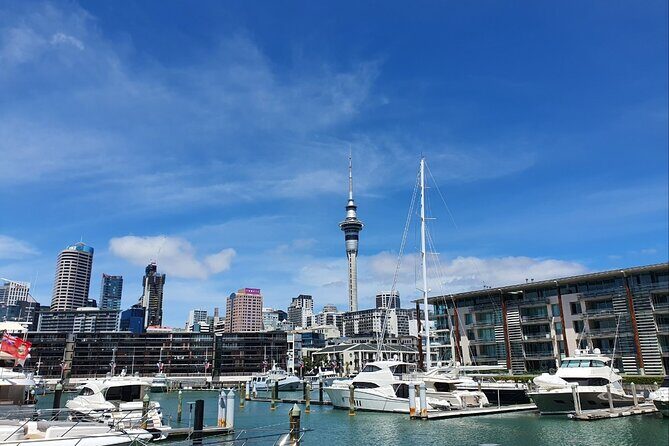
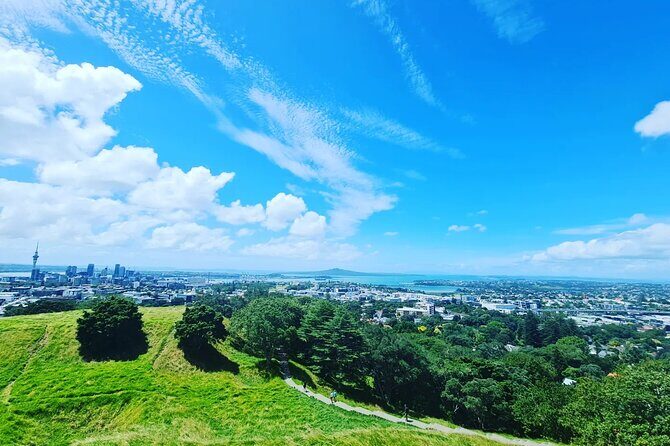
Mount Eden, or Maungawhau in Māori, is one of Auckland’s iconic landmarks, and this stop is set up for exactly that reason. You get about 1 hour here, with free admission.
The standout detail is the height: Mount Eden is listed at 196 metres. That’s what you’ll feel when you arrive—this is the kind of spot where the city spreads out below you. You’ll likely spend your hour splitting time between looking out over Auckland and walking around enough to find your preferred angle.
This is also where cultural naming matters. Seeing the Māori name alongside the popular one helps you connect the viewpoint to the land, not just the postcard angle.
A practical note: if you’re sensitive to wind or want steady photo conditions, plan to bundle up a little. Viewpoints often feel cooler or gustier than street level, and your schedule gives you an hour—so you can adapt rather than rush.
You can also read our reviews of more tours and experiences in Auckland




Stop 3: Auckland Museum for Meaning (And Not Just Standing Around)
Auckland Museum is your longer museum stop at about 1 hour 30 minutes. Admission is included (general entrance), so this is where you’ll get a clear “included value” win compared with the free stops.
The museum is described as Auckland’s War Memorial Museum, a place that mixes history, culture, and natural wonders. The reason I like this stop in a city day is simple: it slows you down. A viewpoint day can start to feel repetitive, but a museum stop gives you context you can carry to the rest of the places.
Also, this timing helps. You’re not hitting the museum too early when you’re still “warming up” to the route. By the time you arrive, you’ve already seen the bridge and Mount Eden, so you can start relating what you learned to what you’re seeing around the city.
One more practical perk: because entrance is included, you don’t have to worry about ticket lines or deciding later whether you want to enter. It’s already in the plan.
Stop 4: Winter Garden Auckland Domain for a Historic Green Break
After museum time, you shift to a garden setting at the Auckland Domain Wintergardens. This stop runs about 30 minutes, and admission is free.
The Auckland Domain is described as the city’s oldest park, which helps you understand why these gardens matter beyond looking pretty. You’re not just getting a quick photo pause. You’re stepping into a site tied to Auckland’s older public park life.
Wintergardens are often about seasonal plant structure and careful landscaping, and in this schedule you get just enough time to reset before moving into the cathedral and the next lookout.
This is also a good place for smaller “rest moments.” If you’ve been walking a lot (viewpoints can do that), 30 minutes in a garden can feel like a breather without ending your day early.
If you care about calm spaces, you’ll enjoy how this break sits between heavier stops like the museum and the art gallery later.
Stop 5: Holy Trinity Cathedral in Parnell for Architecture and Spirit

Holy Trinity Cathedral is in Parnell, a leafy suburb just minutes from Auckland city centre, based on the schedule notes. You’ll have about 30 minutes here, and admission is included.
This stop is both spiritual and architectural. The tour format usually means you get a guided orientation rather than a “wander and hope” visit. Since the cathedral ticket is included, you also avoid the common DIY snag of timing entry or figuring out which areas are open.
What I like about placing a cathedral mid-day is that it adds contrast. Your earlier stops leaned scenic—harbour and city views. The museum adds context. The Wintergardens soften the day. A cathedral then gives you a human-scale space to pause, look up, and reflect for a moment.
If you’re sensitive to places that ask for a certain tone (quiet voices, respectful behavior), this is a good stop because the schedule keeps it short and focused.
Stop 6: Achilles Point at St Heliers Bay for Hauraki Gulf Views
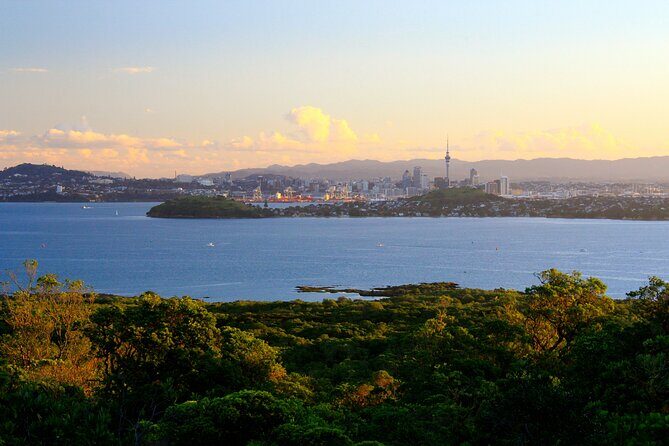
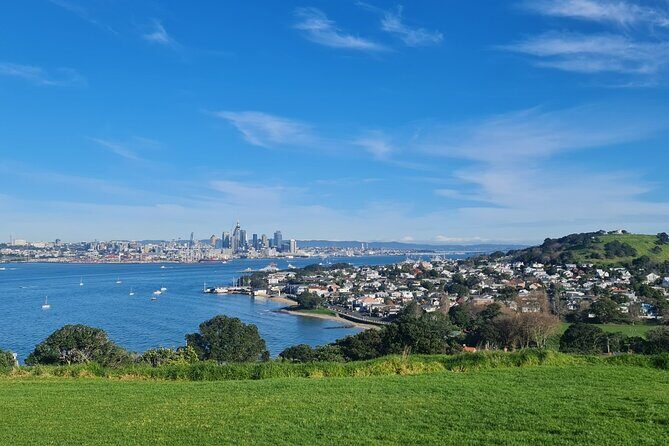
Next comes another lookout: Achilles Point. It’s at the eastern end of St Heliers Bay and offers panoramic views over the Hauraki Gulf. You’ll get about 30 minutes, and admission is free.
This is the “big breath of fresh air” stop in the itinerary. After a cathedral and before the final art stop, you shift back to open sightlines and water views.
Why this works: the tour gives you two viewpoint-style experiences—Mount Eden earlier and Achilles Point here. That way you don’t just get one type of scenery. One is height (Mount Eden). The other is coastal perspective (Achilles Point).
Practical tip: even though the stop is brief, it’s worth taking a few minutes to step away from the busiest angles. With 30 minutes, you don’t have room for chaos. You do have room to find a comfortable spot and settle in.
If you’re the sort of traveler who loves horizon lines, you’ll likely enjoy this more than you expect. It’s a classic Auckland contrast—city energy earlier, then open sea views here.
Stop 7: Auckland Art Gallery Toi o Tāmaki Near Albert Park
Your final cultural stop is the Auckland Art Gallery Toi o Tāmaki. It’s listed as New Zealand’s largest and it sits in the heart of Auckland’s city centre right next to Albert Park. You’ll have about 1 hour 30 minutes, and admission is free.
This is a smart ending choice. After viewpoints and a museum, the art gallery gives you something personal and flexible. You can spend time on a few works that pull you in rather than trying to cover everything.
The time also matters. 1.5 hours is enough to slow down and look, not just skim and leave. And since it’s free in this schedule, you get a bonus value win compared to paying for another major attraction.
If you like walking around parks, Albert Park’s proximity can also make your final stretch feel calmer. Even if your schedule doesn’t time extra wandering, the location helps you transition out of the tour day without needing another stop.
How to Plan Your Day So You Enjoy Every Stop
This tour runs about 7 hours, with multiple stops that range from 20 minutes to 1.5 hours. That means the pacing stays active, even though it’s organized.
Here’s how I’d plan with the details you’re given:
- Wear shoes that work for walking around viewpoints and indoor exhibits.
- Bring a light layer if the weather changes. Viewpoint conditions can feel different from street level.
- Plan lunch on your own, since food and drink aren’t included.
- Bring water, especially if you’re taking photos at Mount Eden and Achilles Point.
Because the tour includes an air-conditioned vehicle and parking fees, you don’t have to worry about some of the hardest parts of DIY touring. Still, you’ll have to manage your own comfort during the walking segments.
A small note about the Māori performance ticket: it’s listed as not included. If you’re specifically hoping to attend a Māori performance as part of your Auckland day, you’ll want to arrange that separately and budget for it.
Booking Timing and What the 49-Day Average Really Means
This tour is commonly booked about 49 days in advance. That doesn’t guarantee it will sell out early, but it does suggest it’s popular enough that planning ahead is smart—especially if you’re traveling during peak season or have tight dates.
The good news is the group size stays small (max 11 travelers). That’s a big part of why this kind of city tour feels pleasant. When you book earlier, you’re more likely to lock in your preferred date.
The Overall Verdict: Should You Book This Auckland Day Tour?
I think you should book this tour if you want a single-day hit list that feels thoughtful: harbour landmark first, then Mount Eden’s viewpoint, then museum context, then gardens and cathedral, and ending with coastal panorama and major art.
It’s also a strong pick if you value convenience. Pickup, air-conditioned transport, parking fees, and guide time are built in, and the day includes entrance fees for Auckland Museum and Holy Trinity Cathedral. That’s real savings in effort, not just money.
I would not book it if you already have your own transport and you’re committed to building your own route for the cheapest possible option. Also, if you hate tours that move you from stop to stop and prefer long, slow solo visits, the schedule’s mix of 20 to 90 minute segments may feel too paced.
If you want a guided day where you get city views, cultural stops, and museum/art variety without heavy planning, this one is an easy yes.
FAQ
How long is the Auckland Full Day Attractions & Museums Tour?
The tour lasts about 7 hours.
What time does the tour start?
It starts at 9:30 am.
Does the tour offer pickup?
Yes, pickup is offered.
How many people are in the group?
The tour has a maximum of 11 travelers.
Are tickets included for all stops?
Auckland Museum general entrance fees and Holy Trinity Cathedral admission are included. Other listed stops are free.
Is food and drink included?
No. Food and drink are not included.
What is the cancellation policy?
You can cancel for a full refund up to 24 hours before the experience start time. If you cancel less than 24 hours before, the amount you paid is not refunded.